free 3d sex pic's and drawings.net free
3D art: 34 incredible examples to inspire you lot
Creating 3D fine art takes a great deal of skill, but if you're willing to put in the try then you tin can achieve stunning results. Working in 3D adds a level of depth and realism that'south extremely difficult to capture when working in 2D, and if yous are just starting out in 3D, you can use these pieces of 3D art as inspiration to propel you forward. Besides as presenting the beautiful images, we've also spoken to the artists to hear a little about their workflow and design process.
There is a huge range of tools out in that location to utilise in your 3D art process, as our guide to the best 3D modelling software proves. This list includes a range of complimentary software, platonic if yous're just getting started.
Click the icon in the pinnacle right of each image to run into information technology total-size.
01. Robery DeNiro, Casino
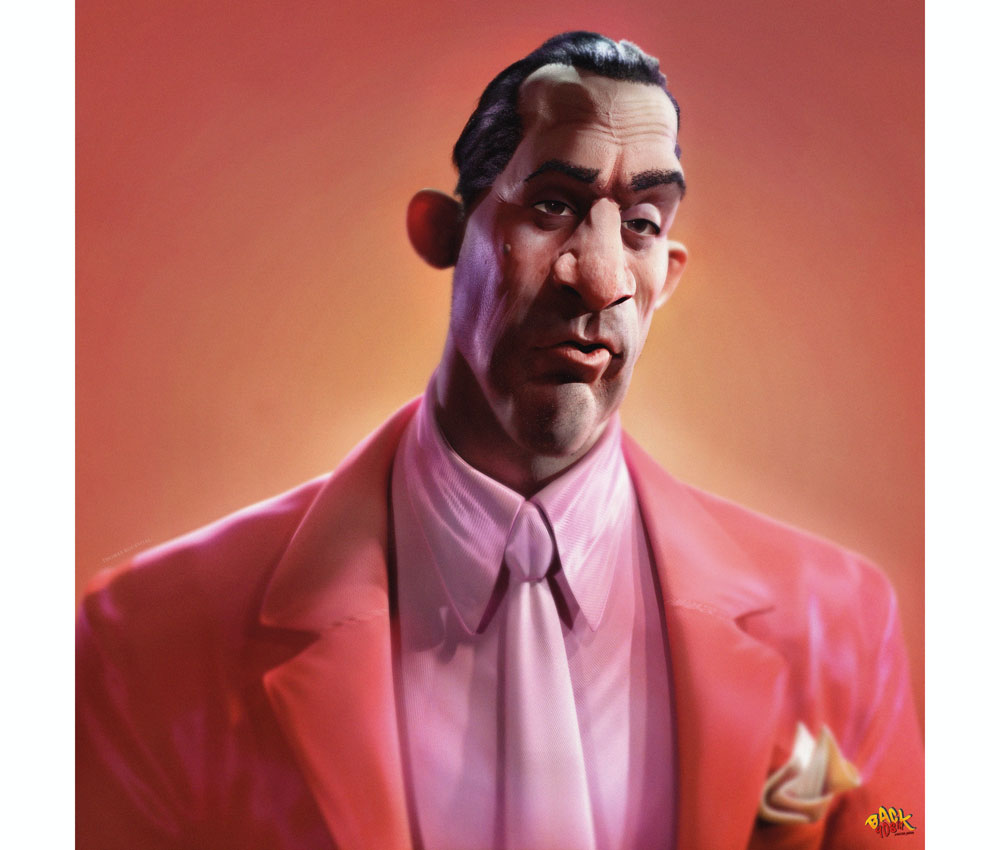
Character artist Thomas Rousvoal created this fashionable fan fine art of Robert De Niro every bit role of his 'Back in '90s' series. An important aspect in the design was to give De Niro "his item personality and legendary facial expression, balancing the reality and respecting my drawing stylisations," Rousvoal explains.
Rousvoal paid close attention to applying noise and grain to the image for this 3D art, evoking the atmosphere of Martin Scorsese's Casino. "I like to requite life to my works, add defects to them. The homo eye is total of imperfection, photograph and movie house lenses imitate our vision. I try to become as close as possible to this," Rousvoal explains. "I have my own anamorphic lens photographic camera setup."
Rousvoal has as well adult a style of working that consists of edifice the body of a character that already has details, thanks to real 8K scanner peel maps that he projects onto UVs in Mari. He adds: "All the characters I start are from the aforementioned body, and even UV. This allows me to first a new sculpture with different shapes while having my layers of realistic skin details."
02. Olakunde
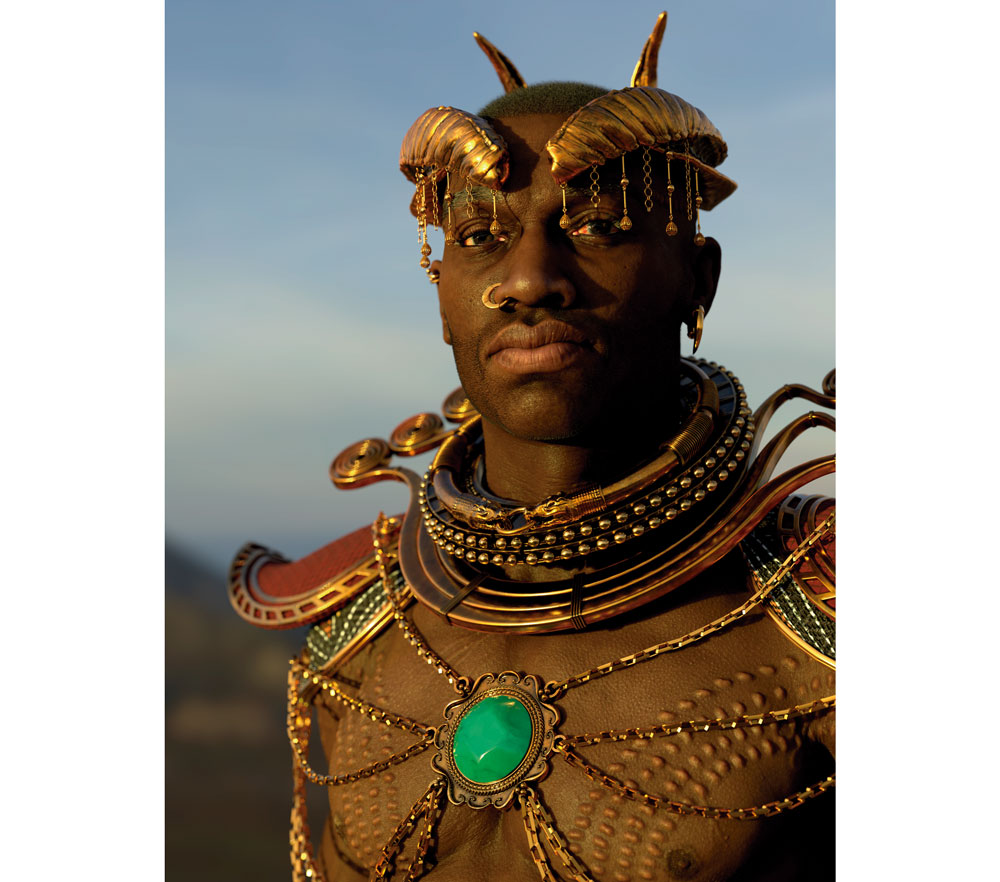
Olakunde, which translates as 'the brave arrived', took Brazil-based 3D character creative person Jack Malone two months to complete. He worked on the incredibly detailed character in between cinematic and video game projects for a range of companies. Malone immerses himself securely into each project, always aiming for more merely a simple 3D model. "My commitment is to add different art aspects to my work, similar composition, blueprint and art management," he explains.
The most challenging aspect of Malone's process was discovering and defining the African way, "it was rewarding when I finally got the right design," he adds. After assembling a ton of references, Malone made a raw sculpture to improve understand the anatomical proportions of the character and design of the assets. He utilises every bit many UDIMs as possible to achieve a bang-up UV texture resolution.
Afterwards this, Malone starts piece of work on the torso texture in Zbrush using Hard disk drive Geometry forth with the asset textures in Substance Painter. Marvelous Designer was employed to create and simulate the character's skirt, likewise as the material chugalug tied effectually his waist. In the terminal stage, everything was assembled in Maya and rendered using Arnold.
03. Sunshine Bloc

Vincent Moubeche has been creating 3D art for the past decade and currently works as an surroundings artist for Compulsion Games in Montreal, Canada. He's been working on this fun Super Mario fan art for two months, taking a break in December. "The scene is not technically impressive," Moubeche admits, "I did what I know all-time: modelling and level art. The just unusual thing I did is rework all the metrics from the original Plaza to fit the more than compacted idea I had of the area."
So many buildings were needed for the scene that, rather than making each one unique, Moubeche used kits. He then utilised placeholders with minimal details to plot the scene in 3ds Max . From there he'll make loftier-poly versions of the avails with 3ds Max or ZBrush. Playing with photographic camera angles and focal lengths allowed Moubeche to achieve happy accidents such every bit tilt shifts. For this 3D art project, Moubeche likewise employed Substance Painter's Gradient Blur for the outset time: "I added a pattern with the Gradient Blur to break the shape," he explains, "information technology brought something interesting into the scene, even if it is subtle sometimes."
04. Y-Wing redesign 2020
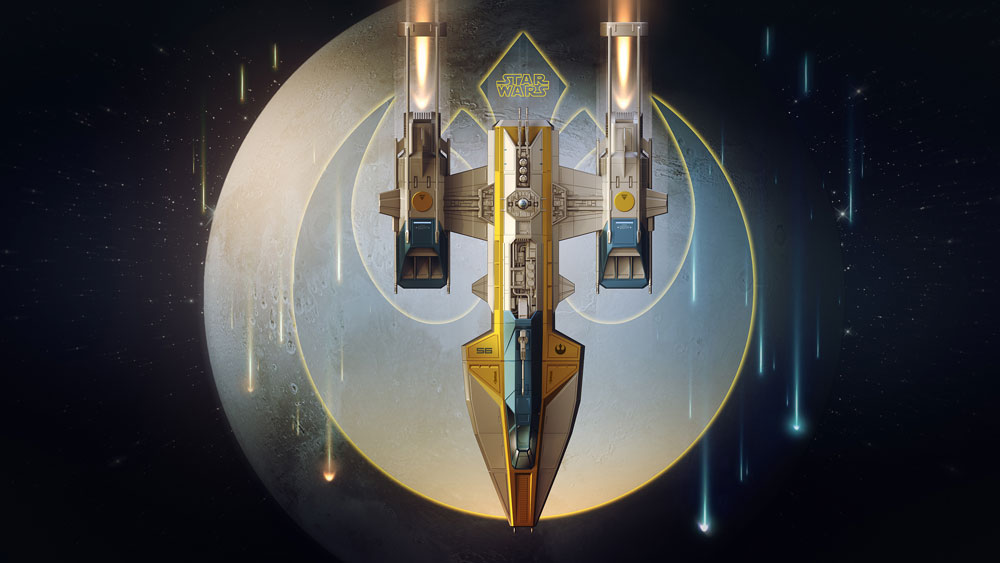
Piece of work on the intricate 3D model of this Y-fly design took Ubisoft senior 3D environment creative person, Encho Enchev, just iii days to complete. Enchev built the model in 3ds Max, before rendering in V-Ray and applying finishing touches in Photoshop.
In his twenty-four hours job at Ubisoft Enchev will begin projects by making rough sketches to nowadays his ideas to the art director. Next he creates a low-poly 3D model to figure out the correct proportions and composition for the piece, standing with the details one time he's satisfied. "If I'm making an in-game model for Ubisoft I unwrap the model and starting time texturing and baking in Substance Painter," he explains, "if I'grand doing a pattern for me I will skip the UVs and but practise a paintover afterward I'one thousand done with the renders."
Enchev adds that his inspiration comes from seeing a piece of work of art evolve from initial sketch to a existent 3D model in a movie or game.
05. J.R.R Tolkien
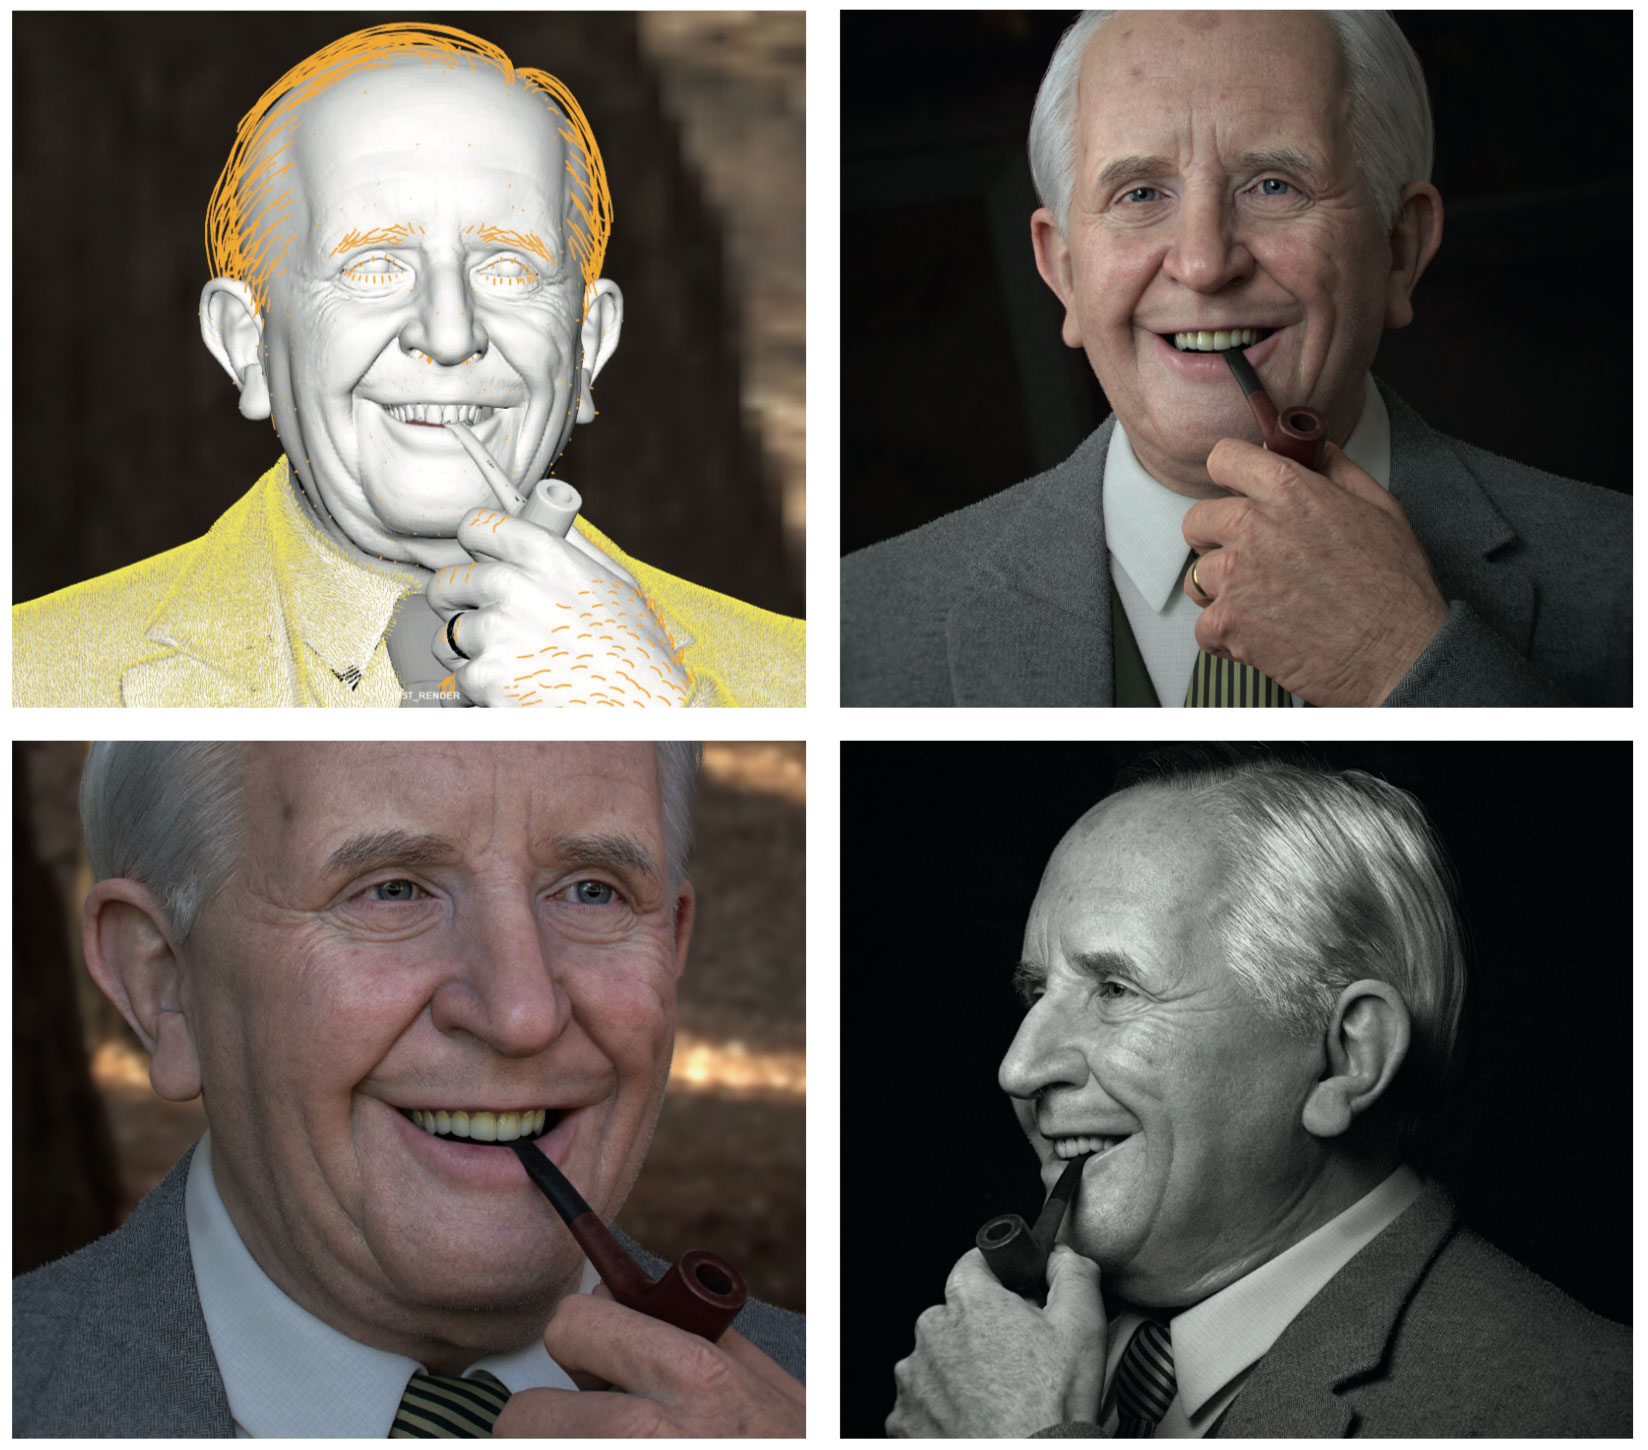
It took character artist Roger Magrini three months to complete work on this lifelike recreation of The Lord Of The Rings author J. R. R. Tolkien. "Everything was mitt-sculpted and Polypainted in ZBrush on Hd Geometry," Magrini explains, "except for his pipe, I used Substance for that."
Magrini began by gathering every bit much reference as possible, all with dissimilar angles and lighting setups. "Likeness is like a puzzle," he adds, "so you need reference to fill in the gaps." Magrini sculpted the likeness in ZBrush, before adding skin details past paw, using brushes he created. "Then I Polypaint the Albedo, Specular and Bump maps," he continues.
Magrini challenged himself to achieve photorealism from the very first render of this 3D art, without any mail- processing. "I as well like to do a stress test in different lighting setups," he adds, "to see if things hold up."
06. Ember
Graphic symbol artist Sina Pahlevani worked on this prototype every day later work, completing it in around ten days. Rather than undertaking extensive planning, Pahlevani likes to develop his artwork throughout the process. "Most of the time I don't have a articulate image in my mind, I merely define the main story of my artwork. I might change things a lot during the process."
Start, Pahlevani blocks out the character's shape and silhouette in ZBrush. The second stage is adding further detail and enhancing the shape of the grapheme, earlier it undergoes retopology, UV and texturing. "I exercise retopology and UV in Maya," Pahlevani explains. "For the texturing part y'all might use Mari, Substance Painter, or ZBrush Polypaint." The final stage of the pipeline involves setting up the shaders and lighting the scene, before making early test renders in Arnold. "After you lot get the commencement result you demand to go back and forth to modify your model," Pahlevani continues, "using textures and shaders to reach your desired effect."
07. Ramen
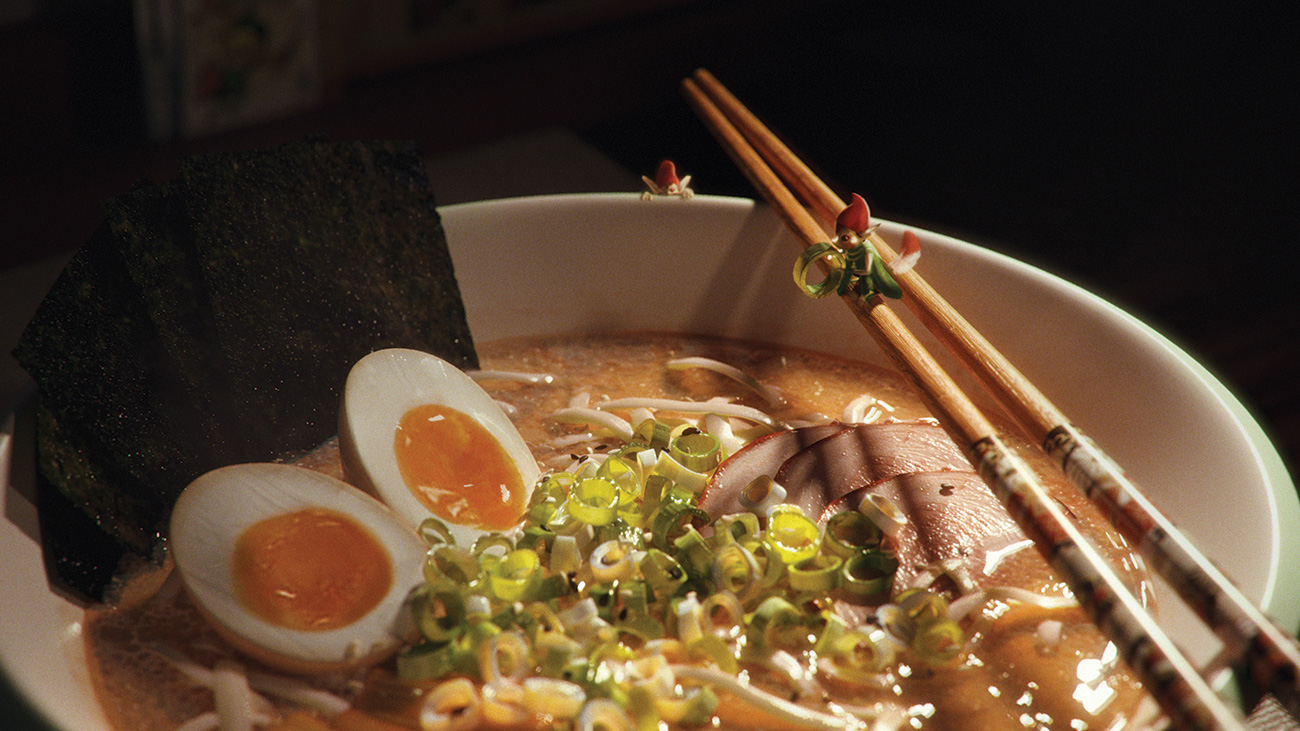
This appetising image provided 3D student Laura Keuk with an opportunity to apply shading and lighting to create a dreamy and peaceful atmosphere. She used Blender's cloth simulation for the noodles, doing 1 noodle and then duplicating it, earlier simulating them but like clothing.
"I used deportation for the oil," she continues. "I spread the onion springs using a particle simulation with three different instanced meshes and shaders. I played with the scale and rotation to add more than randomness to the elements."
Keuk is inspired to create images similar this by the ins and outs of daily life: "I beloved to watch all the simple things surrounding me and understand what makes it cute. It tin just be a leaf on the ground, the way bloom petals are arranged, the way light bounces off a slice of carbohydrate, or just a cat walking."
Nutrient is a symbol of sharing, gathering and happiness in Keuk's family unit, and she wanted to portray this in her Ramen image. As Keuk puts information technology: "The feeling I had when I was younger, the feelings food gave me, and a bit of a magical sensation, where the spectator could come across that beauty can be from each affair surrounding us."
08. The Golden Skull
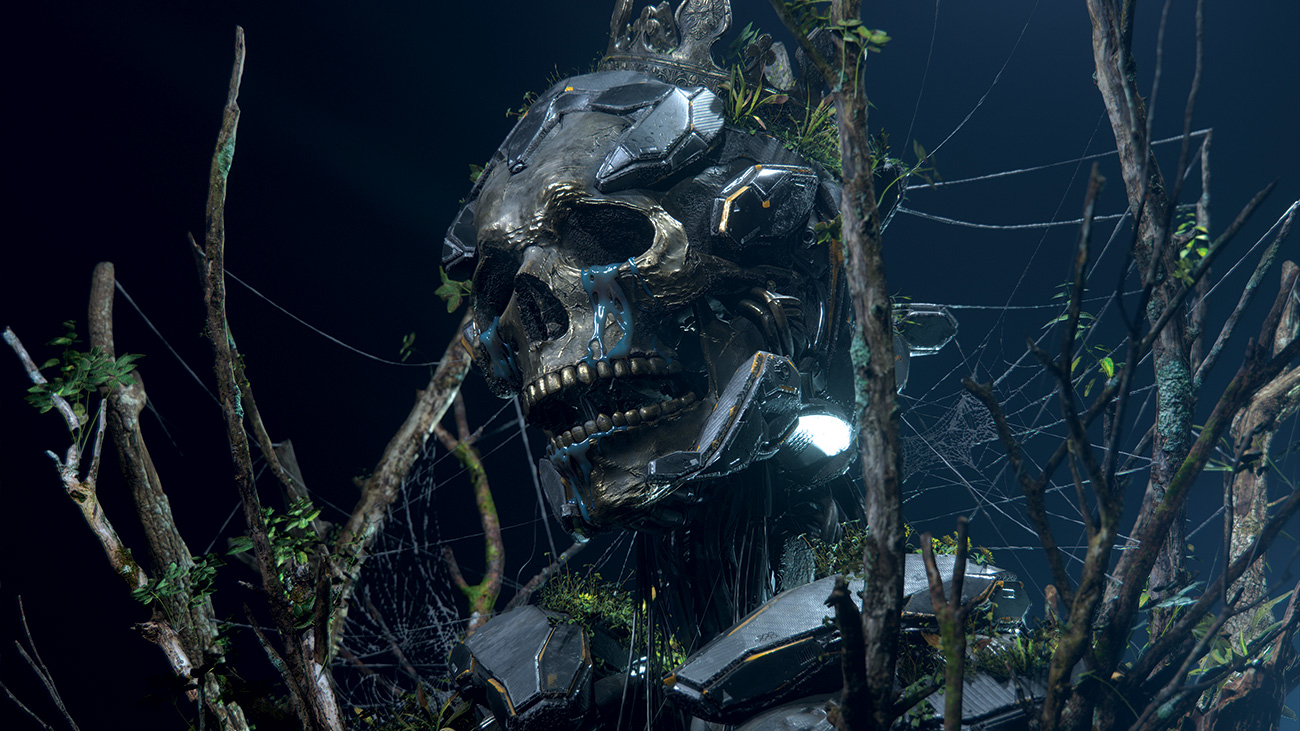
To create this haunting image, CG manager, art manager and environment creative person Hirokazu Yokohara used a variety of notable techniques. MECH/FY - Procedural hard surfaces for Blender two.viii were used to help create the finer details of the mech. "In addition, I tried using the real-time renderer EEVEE experimentally," adds Yokohara. The grass was made using Blender addition Graswald.
The 3D art image took about v days to complete and provided Yokohara with an opportunity to acquire and experiment within Blender. He continues: "Thanks to real-time renderer EEVEE, I was able to finish the piece of work chop-chop because I could go along with modelling, layout and lighting while watching the final quality image."
Yokohara'southward chief tool is Cinema 4D (see here for some smashing Cinema 4D tutorials), which he finds intuitive and easy to employ. "Since I am a CG generalist," he adds, "I study diverse tools and workflows daily and effort to output them as fine art."
Previously Yokohara has worked on various CG projects related to movies, from photorealistic characters to more stylised characters and environmental design. "All these things inspire me," he continues, "from artwork to everyday piddling events. The latest technology is also a huge source of inspiration."
09. God Pan
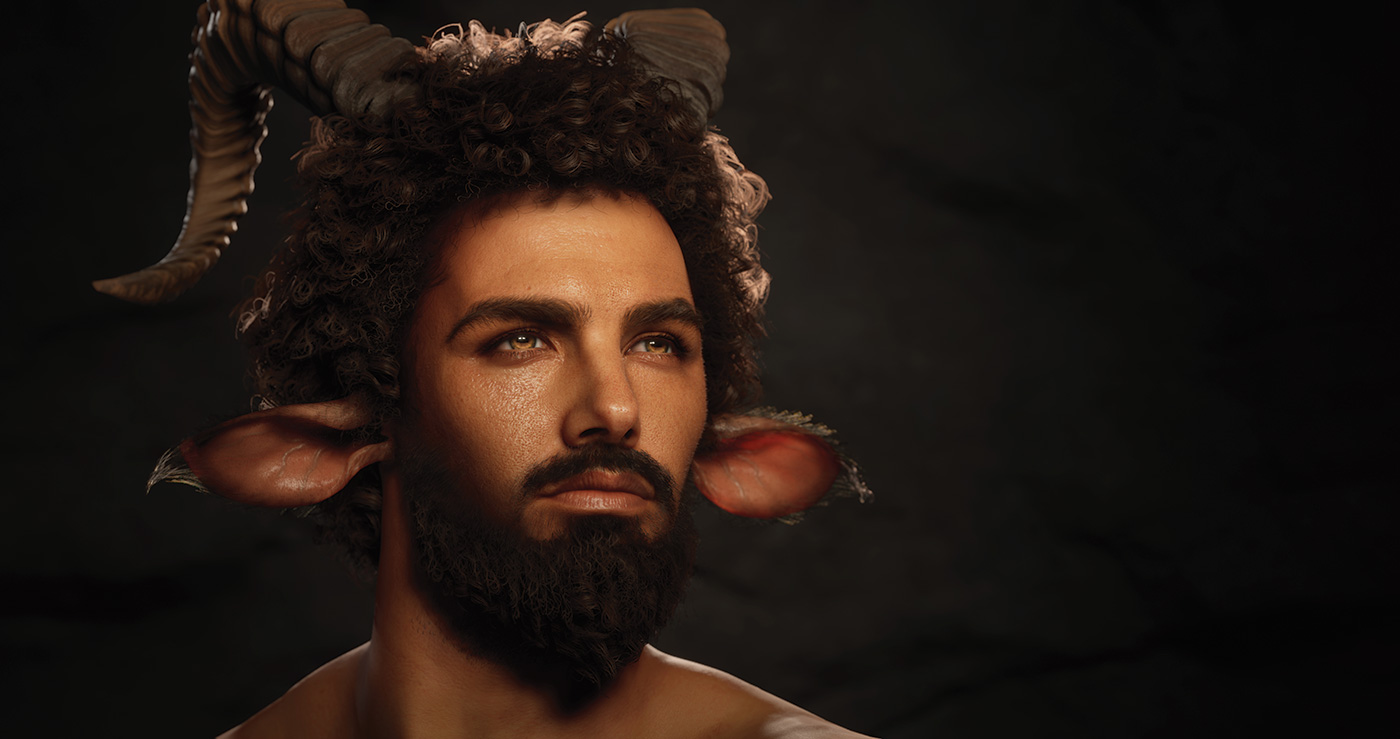
The biggest challenge that professional 3D artist Baolong Zhang faced on this project was creating the character's photorealistic hair. "He's got very curly hair that required a lot of attention," explains Zhang. "I used ZBrush FiberMesh to create the main volume of hair, then the smaller hairs were hand-placed. The shorter facial furs were created with XGen in Maya."
Throughout the project Zhang was inspired by the photography of Cristian Baitg Schreiweis, and he particularly enjoyed searching for farther references. "I started searching for more references similar Greek statues and paintings," he says. "It's fun to put these together in 3D, particularly with Unreal Engine four." Elsewhere he finds inspiration in nature and classic art.
Finding an interesting subject is crucial to getting a proficient commencement on a project, co-ordinate to Zhang: "I attempt to have a practiced idea of what information technology's going to expect like. Every bit I'yard not a concept artist, I don't actually have a final concept, but I have a lot of reference to follow."
10. Game Buildings
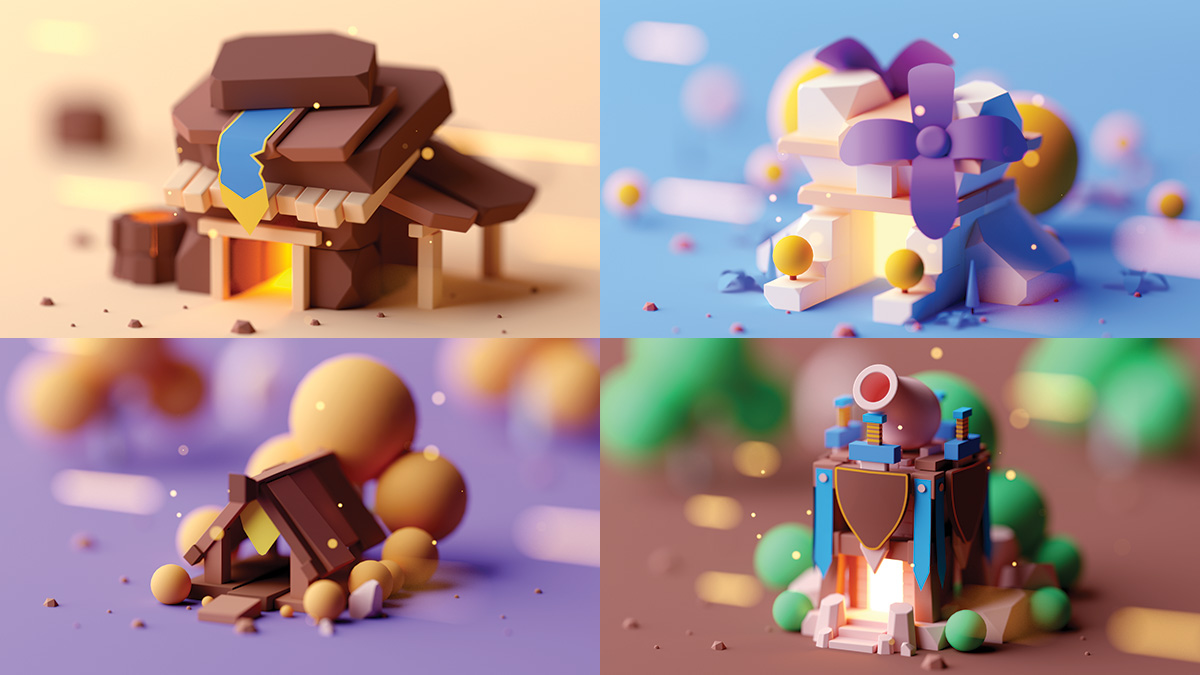
This 3D art project from art director and move designer Gustavo Henrique is a simple yet effective 3D blueprint. "All constructions were modelled in a very unproblematic way," Henrique explains. "Almost of my designs are simple but total of details," he continues. "I always effort to work with geometric shapes and most of my models are made from a cube. I use the Bevel tool to exit the edges of the objects rounded and create the feeling that information technology's something fluffy."
Later modelling the scene, Henrique gets to work on the render settings using Octane Render. "The starting time step is to work on the camera settings. I become a flake of perspective using a 150mm focal length. I also increase the aperture of the lens to achieve a blur and give it the feel of a miniature."
Henrique gets inspiration from the feedback he receives from fellow artists:
"What inspires me most is to see people say that they are inspired by my projects. The feeling is incredible and the desire to keep on inspiring other people only increases. I believe recognition is very valuable to artists."
xi. Seahorse in the corals
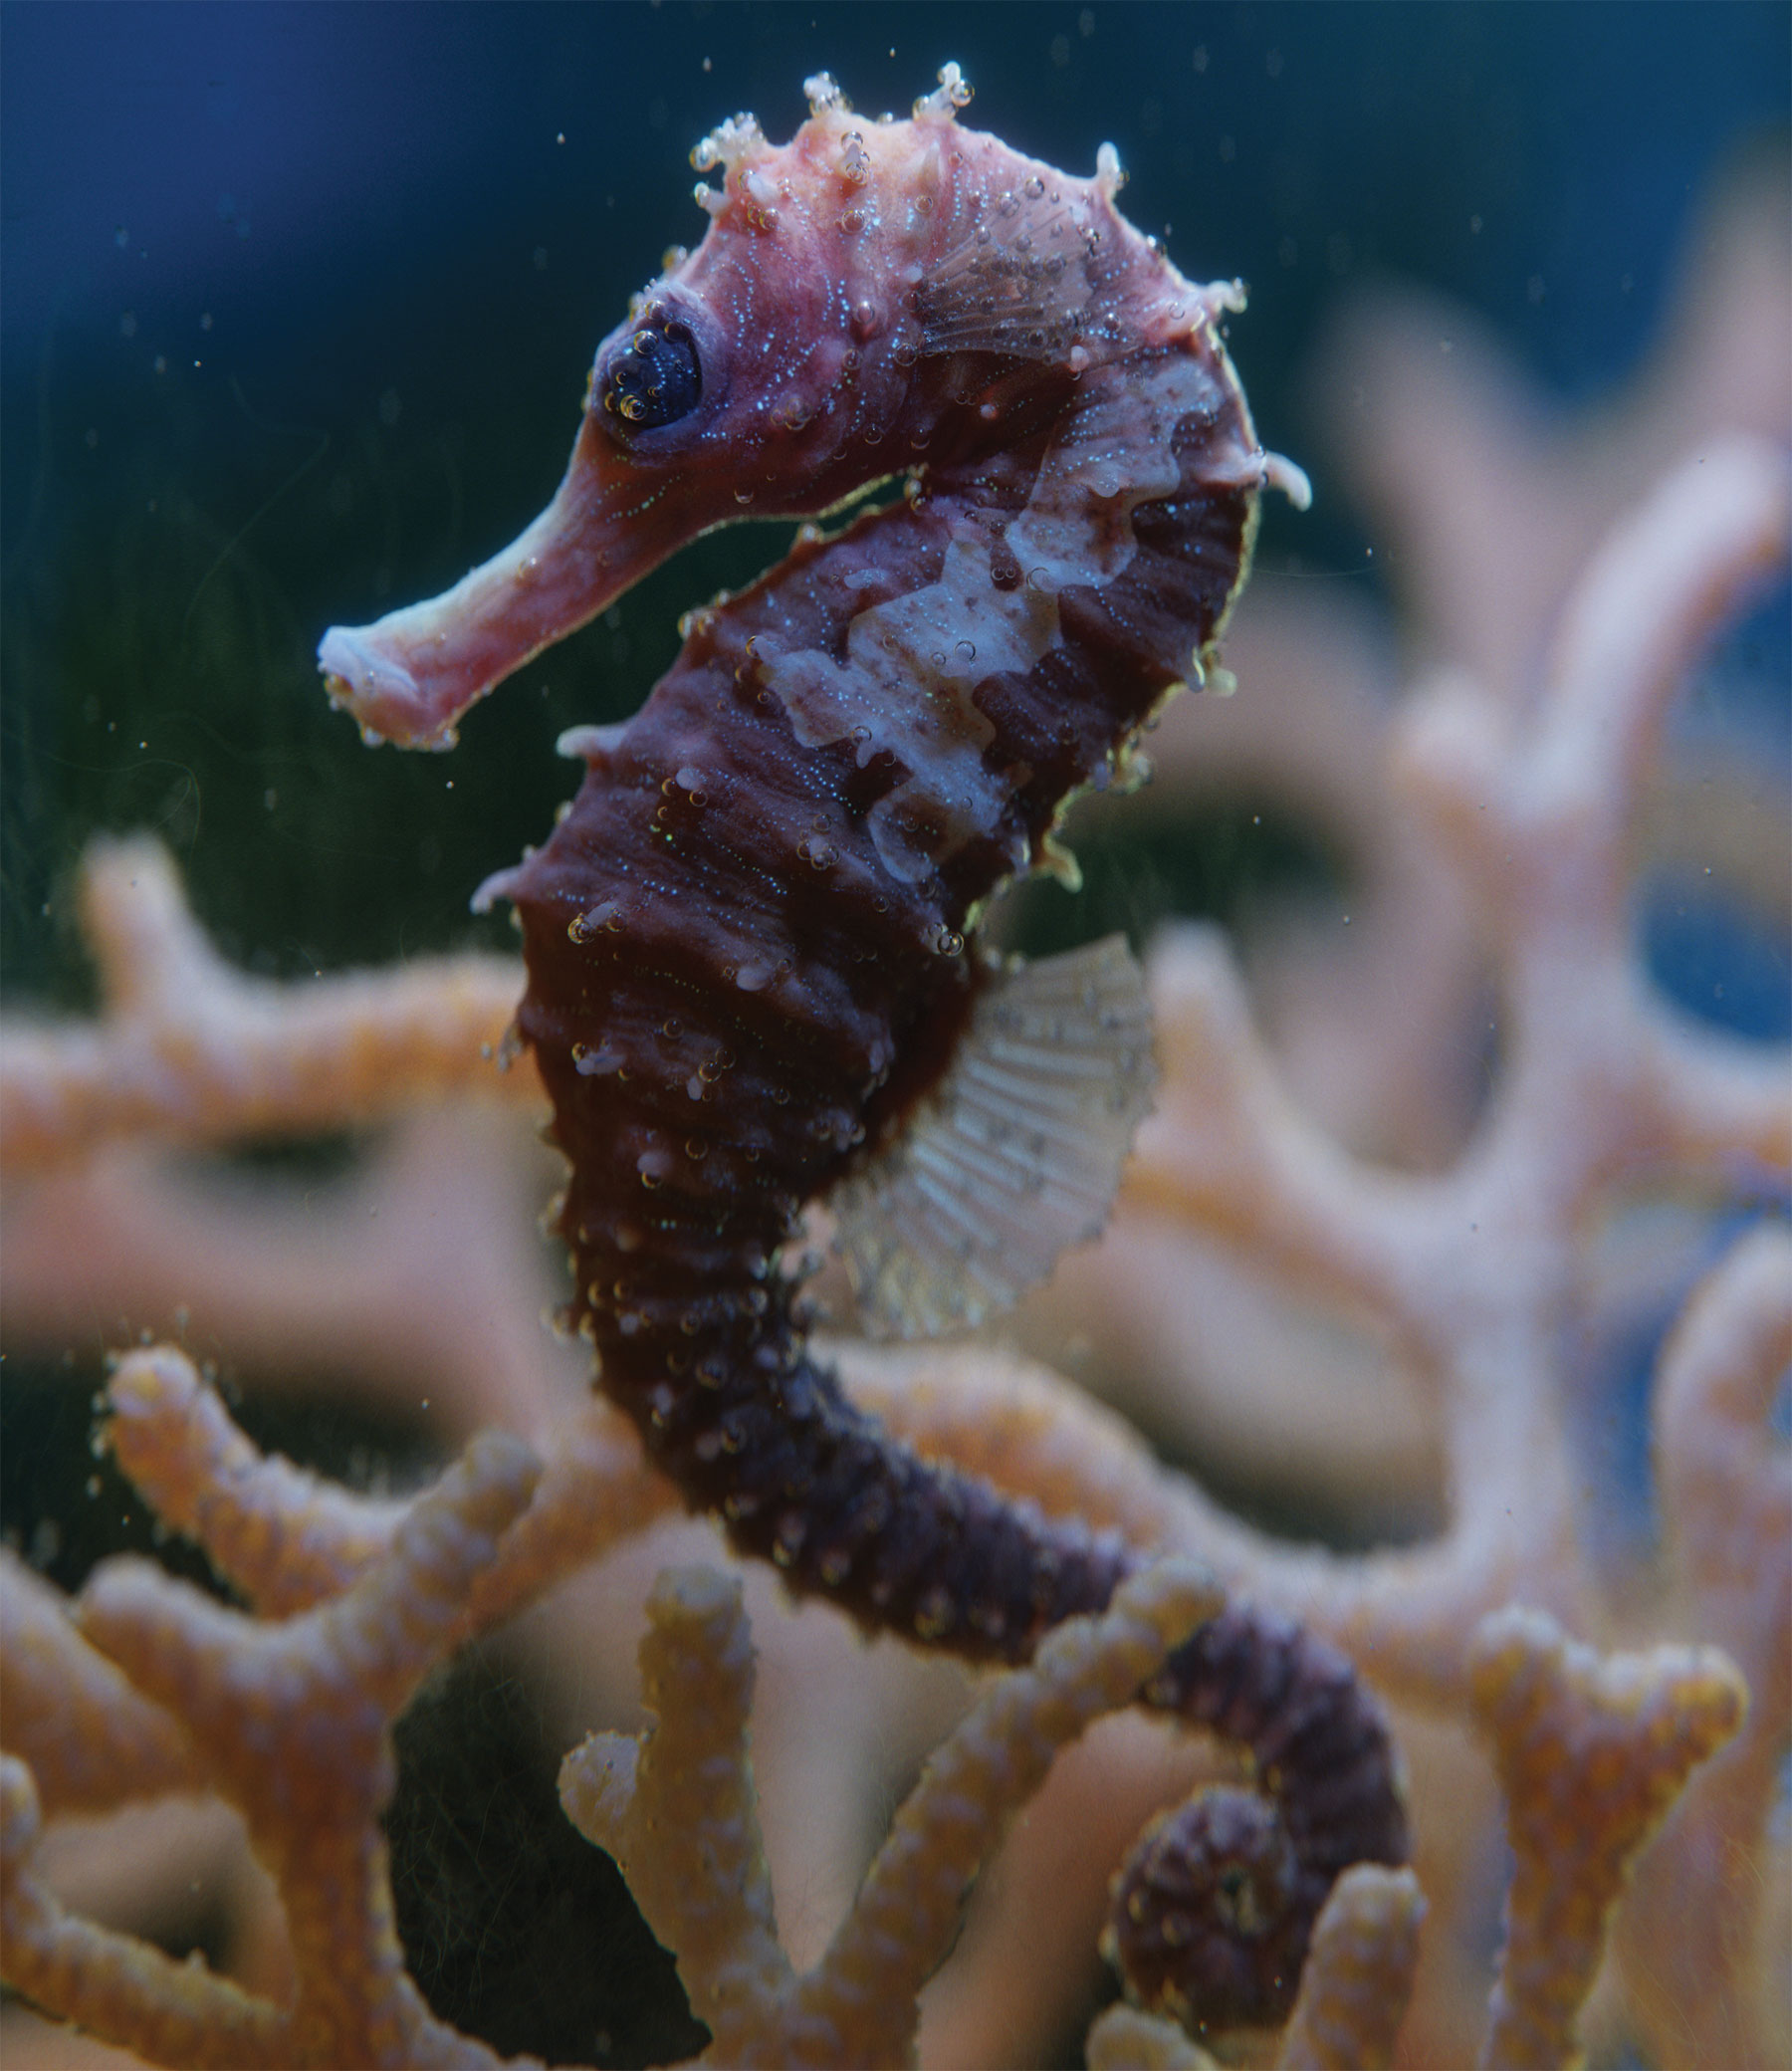
This breathtakingly realistic paradigm took CG generalist Nika Maisuradze merely one week to consummate. "I always wanted to piece of work on an underwater scene," explains Maisuradze. "I was surprised to find that creating a realistic underwater creature, which always seemed like such a challenge before, could be washed with such ease and joy."
The 3D art project, however, was not without its challenges as Maisuradze explains: "From a technical standpoint the biggest challenge was the shading. Instead of painting all my textures, I just painted the main aspects of textures I would need: the main base colour, pocket-size horizontal details, masks of each part of the horse, nose, trunk, tail, and these tiny blue dots. Instead of repainting textures, I just adapted them with these detail textures in the shading procedure, on the fly. For these kind of projects this workflow is much more robust."
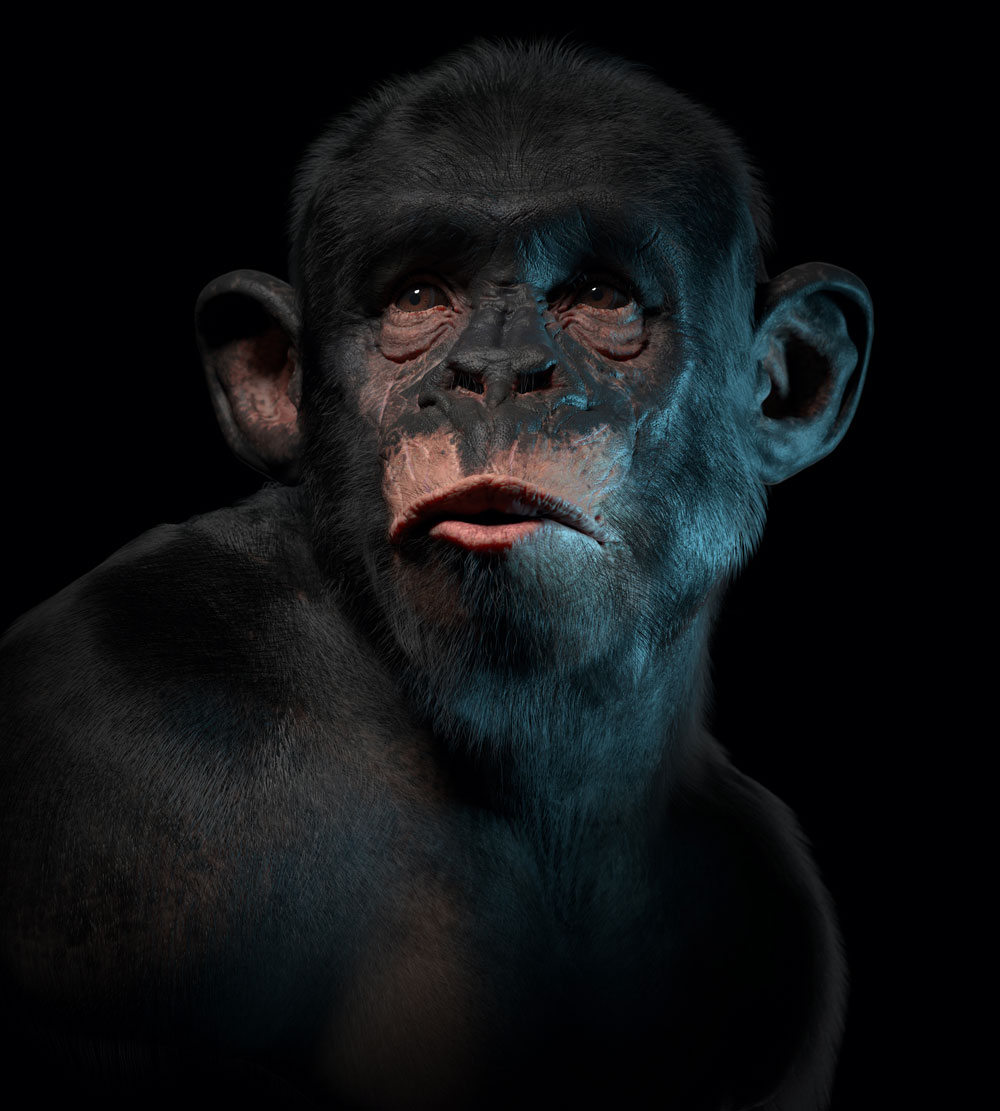
12. Dearest Fabricio
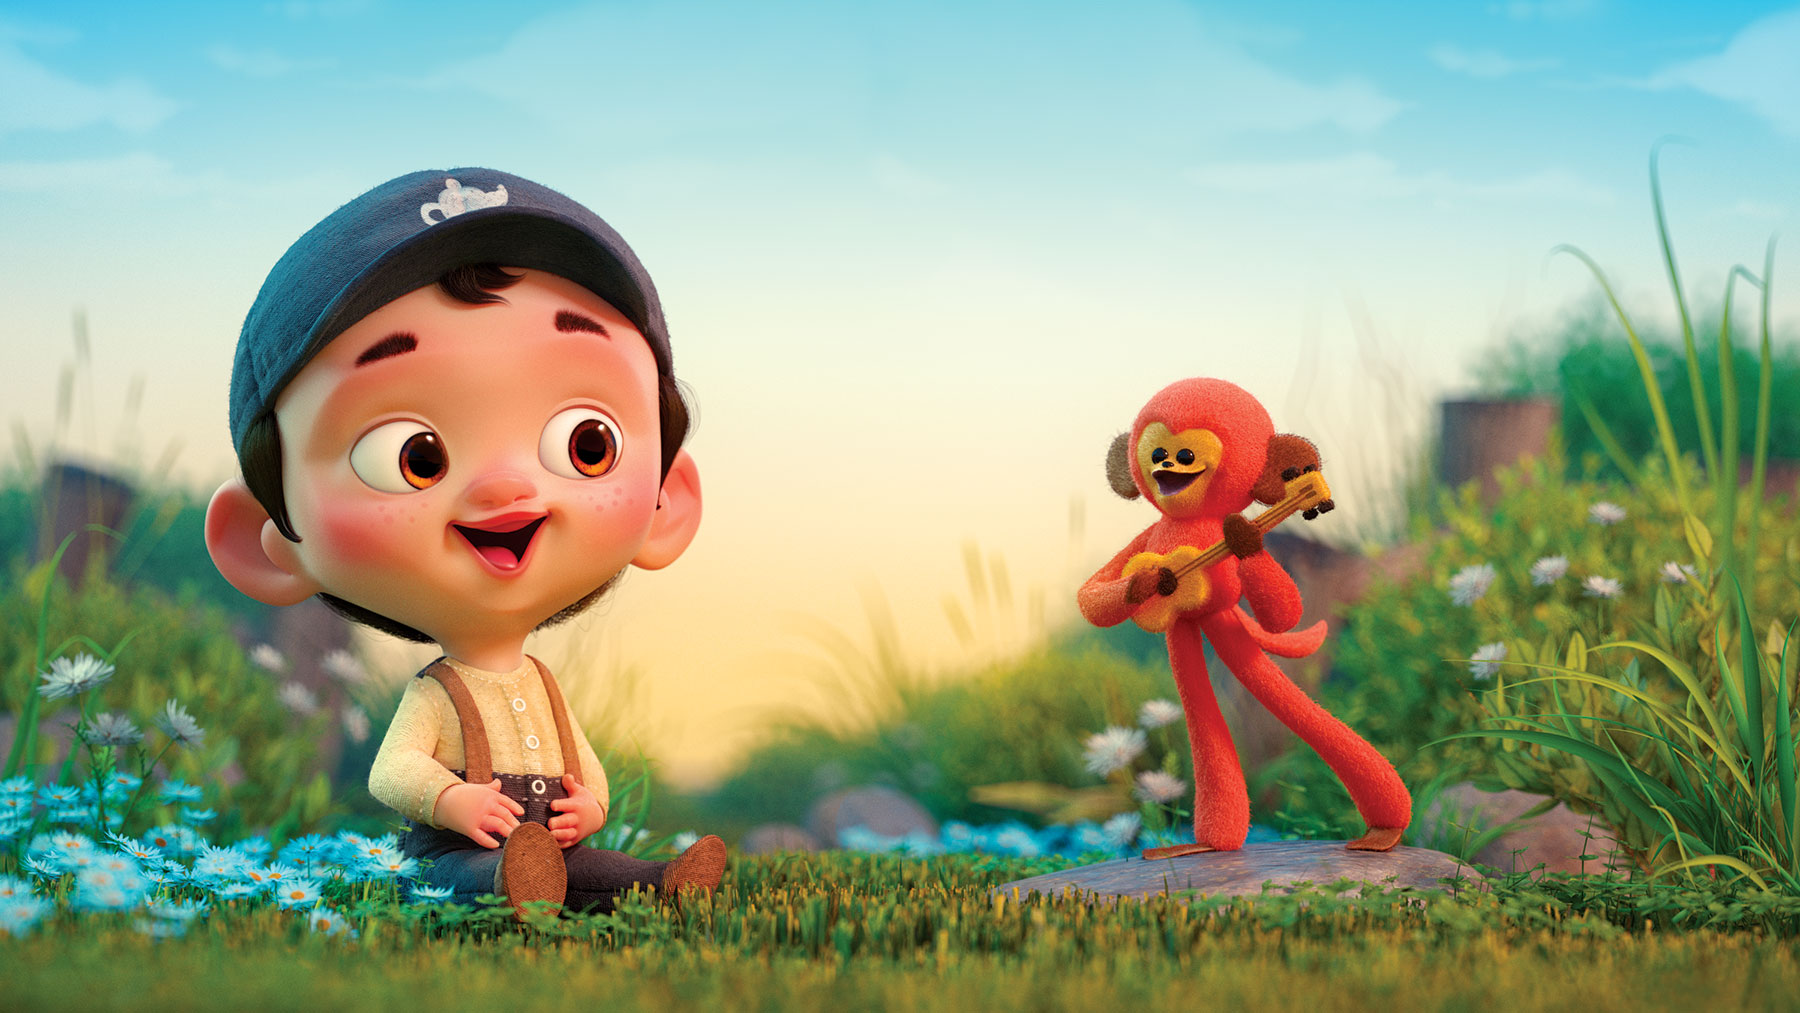
"It took me effectually three and a half days to create the whole piece from concept to last product," says freelance director, CG supervisor and 3D creative person Pedro Conti. This endearing image was a gift for his wife when she was pregnant with their son. The sculptures were based on their ultrasound photos and a little plush monkey from Conti'south babyhood.
Conti has xiii years of industry feel to draw from on personal projects like this: "I ran a company called Techno Image for seven years," he reveals. More recently he has worked on Disney's Moana and currently freelances for companies like Dreamworks, Universal Studios and Aardman.
"I spent more time thinking nearly colours, layout and composition than on fancy 3D techniques with this image," explains Conti. "I felt I should go back to the principles of design and learn more well-nigh traditional techniques such as photography, design and Gestalt Theory. If yous empathize those aspects of fine art you volition notice a style to make it piece of work in 3D."
13. There'southward a Pulse!

"I like experimenting in ZBrush," says concept artist and comic volume colourist Neeraj Menon. "Marvellous designer is something new I'm playing with. I do a lot of digital painting so both software come in handy for initial ideas."
"Although the majority of my time was taken upwards sculpting the underlying model, I recall the most meaning function was creating the textile in Marvellous Designer," he explains. "The actual design is elementary, it's only a sail of cloth. The real challenge was to lay it just right, hiding certain parts and showing others."
Despite being a challenge at times, Menon maintains that this 3D art feel was an enjoyable ane. He concludes: "The most fun function came during the materials and rendering phase. Once the translucency of the textile was applied, what I had seen in my mind really became a reality. Everything fell into place."
14. On the Road to Nowhere
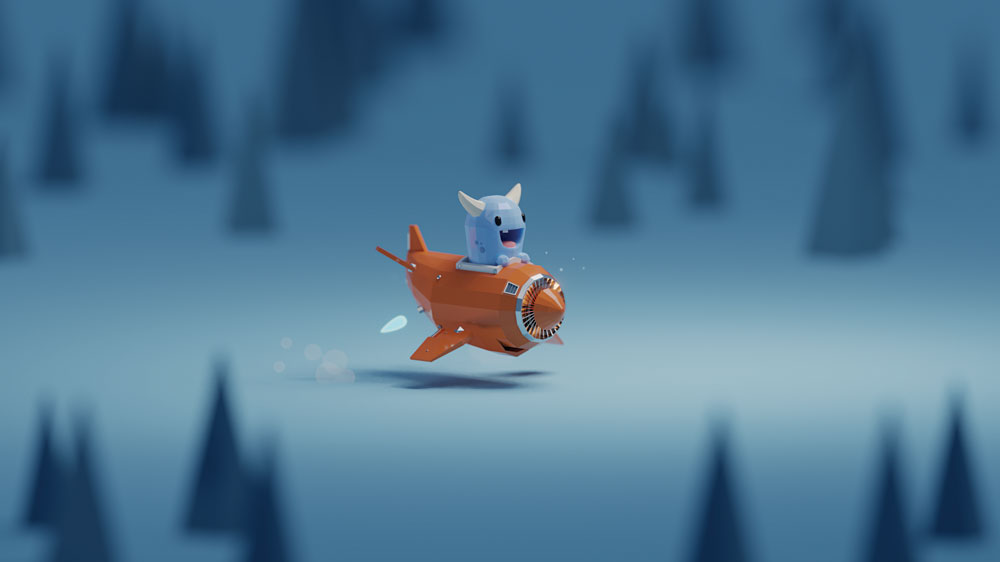
This insanely adorable niggling alien monster pilot was created by Mohamed Chahin in Blender, before rendering in Cycles. Chahin says that when it comes to 3D art, he's virtually inspired past stories.
"As artists it's our task to tell these stories in a more than visual fashion," he says. "After all, all artists are storytellers." It's certainly fun to imagine just what this lovable piffling critter could be getting up to every bit he flies effectually in his orange shipping.
15. The Woods
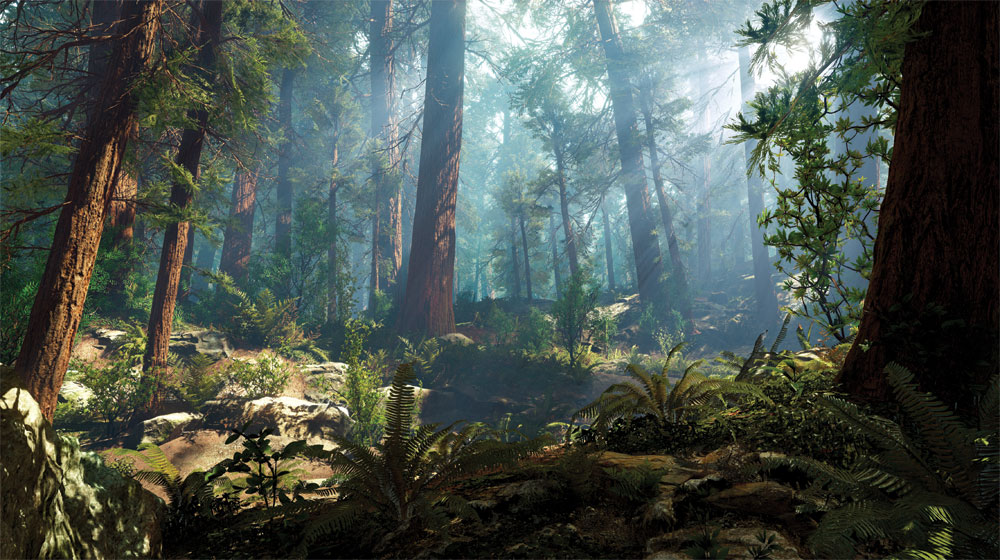
When lighting artist Joannie Leblanc created this beautiful 3D art woodland scene, she knew just how important it was to use lighting finer to produce the mood she desired.
"Lighting is not just about light and shadows," she explains. "You need to call up about what people will focus on in your art to grasp their attention. Contrast, depth, colours and rhythm will help the eyes travel in your moving-picture show similar a menstruum, letting the viewers immerse themselves into your earth."
xvi. Somerset Isle

Somerset Isle is a existent-fourth dimension environment rendered with Unreal Engine. "The composition and lookdev is heavily based on the amazing concept works from Chong FeiGiap (Running Snail Studio)," explains surround artist Tomer Meltser of his paradigm, "while many of the pattern and structure ideas in the environs (boats, architecture) are based on images of Chew Jetty (Malaysia) and other waterfront towns of this nature."
17. Aghori Portrait
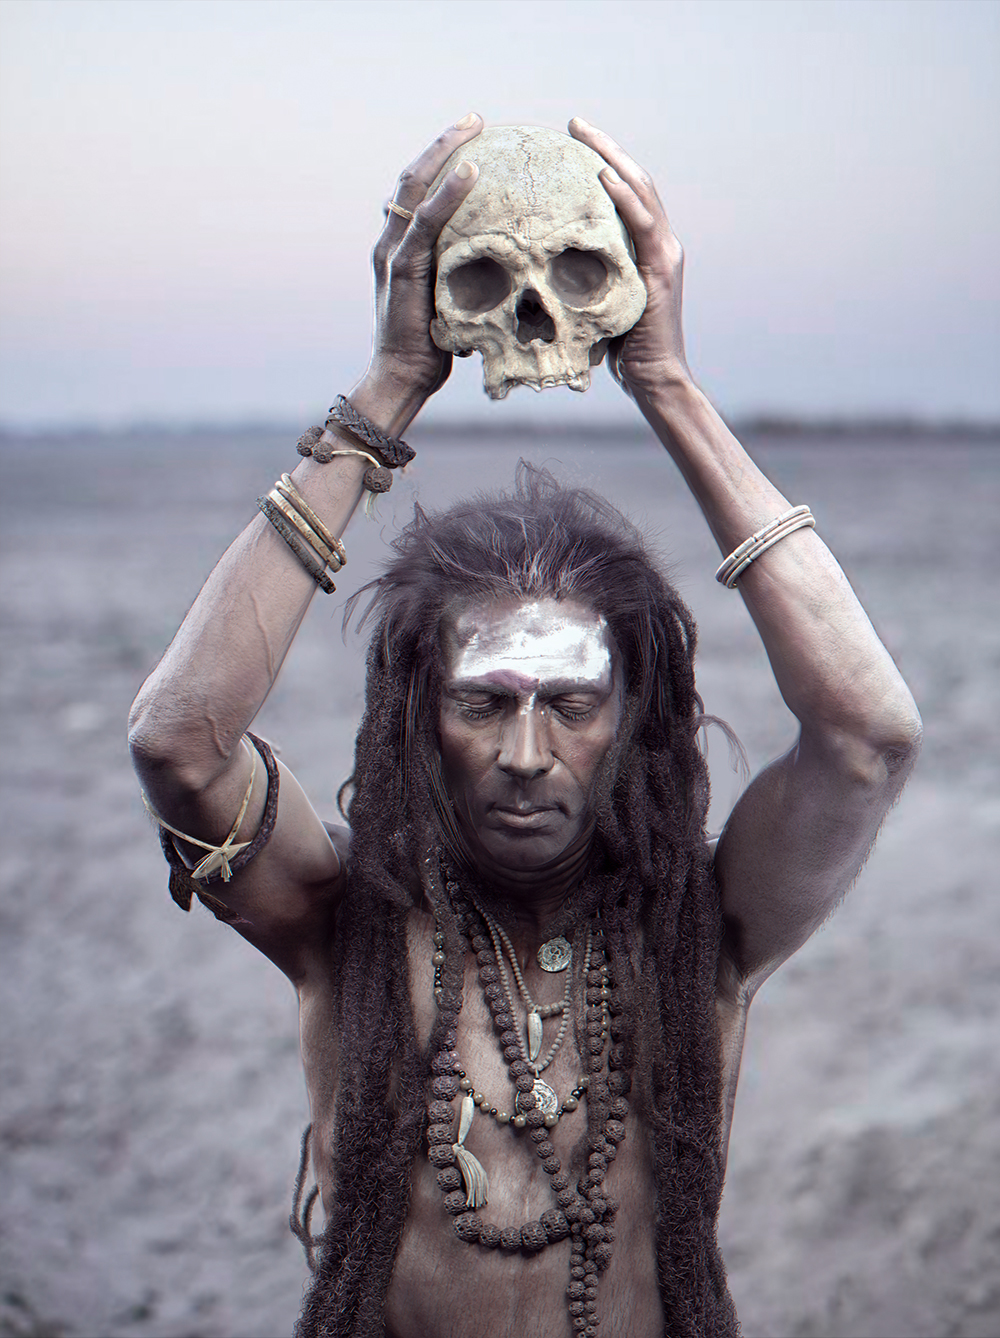
It's hard to believe that Aldo Martínez Calzadilla'southward 3D fine art, Aghori Portrait, created using ZBrush, Maya and Mari, only took two weeks to finish. "I endeavour to work every bit fast every bit possible," he explains. "In my experience, moments of inspiration don't terminal too long, so I try to go through the process of creating an paradigm as efficiently as I can."
The meticulous groundwork of modelling and sculpting was his favourite part of the 3D art project. "I knew that in order to practise a expert chore with the Aghori, the forms and anatomy had to be expert and accurate to the reference," he reveals.
18. PKTS_09
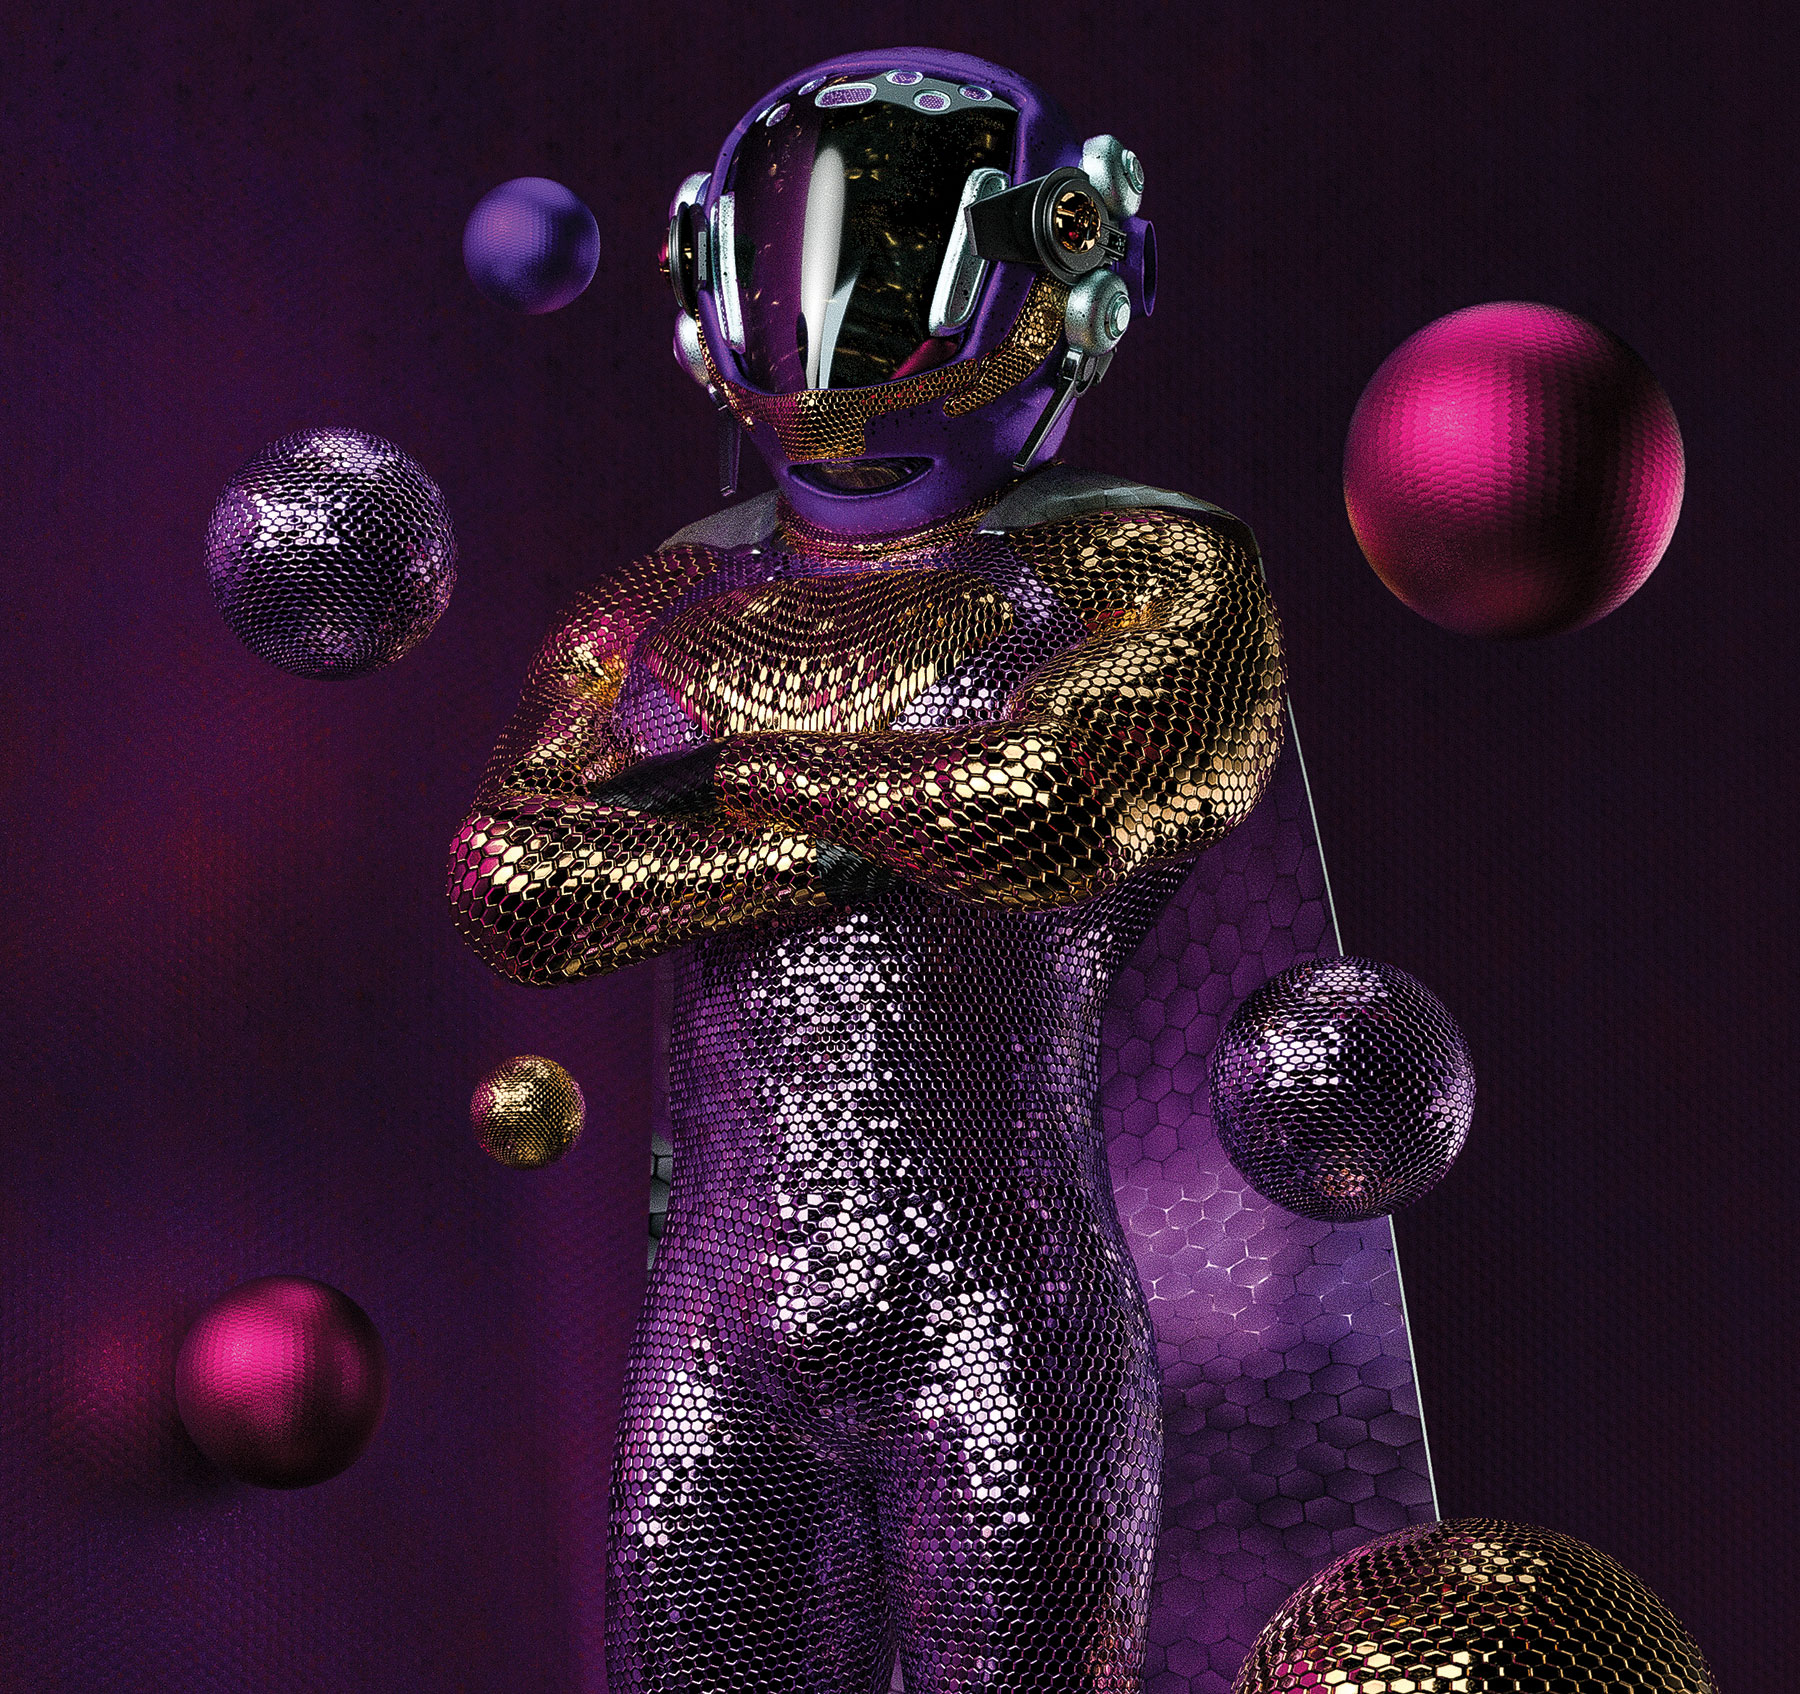
PKTS is an abstract, sci-fi and gimmicky 3D art series from freelance art director, concept and 3D creative person Eugene Golovanchuk, also known as Skeeva. Personal projects similar this e'er evolve out of the smallest and simplest of experiments.
"Combine simple shapes and colours and meet if yous have that inner sense of what you lot are going to see. If it works and so you can develop the idea into something more than fully formed. Cinema 4D is my main 3D software. I usually use the viewport as an empty canvass, combining different silhouettes and textures into one limerick to see how objects 'feel' inside the scene," he explains.
When information technology comes to achieving the slick and stylish look of his piece of work, Golovanchuk has some simple advice: "The fob is to try and gear up textures and lighting first, so it looks more or less like the final render. And then y'all can conduct on tweaking the model and textures. Most people will say it's wrong and that the procedure should be footstep-past-stride. Yous know what? Don't mind to anyone else, just practice what you feel."
xix. Slug Race
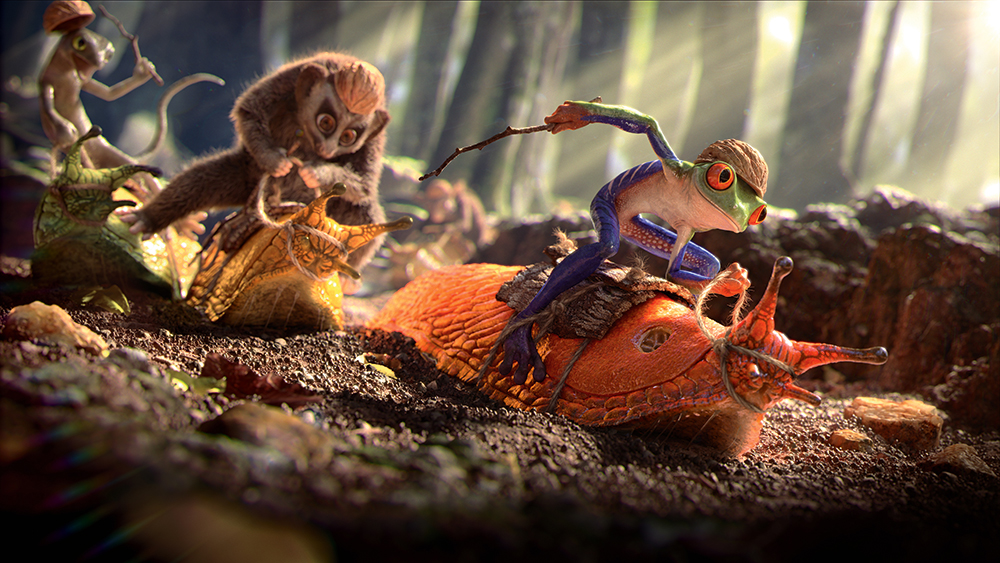
Information technology may exist a whimsical 3D art scene, merely Slug Race is closely based in reality. Brazilian 3D artist Fabricio Moraes and his collaborator Guilherme Formenti used Agisoft PhotoScan to generate 3D spatial information from digital photos.
"Photogrammetry was a technique that I had always wanted to effort. Then I scanned a lot of trees, rocks and ground to become a more realistic arroyo," says Moraes.
The pair used 3ds Max and ZBrush for modelling and lighting, V-Ray for rendering and Nuke for compositing. "I unremarkably use Photoshop to compose the concluding image," says Moraes, "merely this fourth dimension I gave Nuke a try. I was amazed at how powerful it is."
xx. Dark Wood
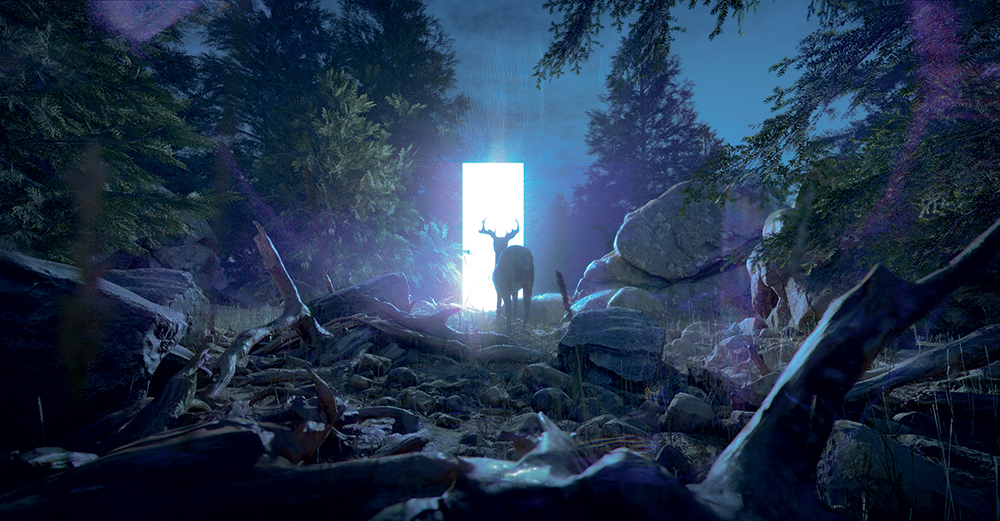
Jakub Javora's surreal Dark Wood scene, with its glowing doorway contrasting with the natural scene, perfectly sums upwardly the artist's eclectic and eccentric interests. "I'm mostly inspired by weird phenomena like chaos theory, sexual pick and various religious practices," he explains.
Unusually for Javora, this scene was a pure 3D composition with no second techniques involved. "Some people are using the aforementioned tools and workflow without changing," he says. "I am always trying to do something extra to continue my creative spirit going and savour the work."
Next page: More great 3D art projects
Related articles
Source: https://www.creativebloq.com/3d/inspiring-examples-3d-art-12121523
0 Response to "free 3d sex pic's and drawings.net free"
Postar um comentário